
You are here: Home » Blog » What To Expect During An External Wall Insulation Project In Oxford
What To Expect During An External Wall Insulation Project In Oxford
Last updated on 4th August 2026 by ProGuard Exteriors
An external wall insulation project in Oxford normally involves surveying the property, preparing the walls, installing insulation boards, reinforcing the system and applying a protective render finish. Understanding each stage can help homeowners prepare for the work and know what to expect throughout the installation.
External wall insulation is a significant home improvement rather than a simple exterior coating. The system creates a continuous layer of insulation around the outside of the building, helping to reduce heat transfer through the walls while transforming the appearance of the property.
Properties across Oxford, Headington, Cumnor, Kennington, Wheatley and surrounding areas vary considerably in age, construction and condition. Some homes have exposed brickwork, while others are covered with pebbledash, painted render or older cement finishes. For this reason, every project should begin with a detailed inspection and an individual specification.
The Initial Property Survey
The first stage is a professional survey of the property. This allows the installer to examine the construction and condition of the external walls before recommending an insulation material, thickness and finishing system.
The survey should assess cracks, hollow render, loose coatings, damp patches, defective pointing and areas affected by water ingress. Window and door positions, roof overhangs, damp proof course levels, ventilation outlets and external services should also be recorded.
Access around the building is another important consideration. Narrow side passages, conservatories, extensions, garages and neighbouring boundaries may affect scaffolding and the thickness of insulation that can be installed.
 Existing wall construction and condition
Signs of cracking, damp or failed render
Available space around windows and boundaries
Roofline, sill and service alterations
Suitable insulation material and render finish
Planning and Building Requirements
Before work begins, any relevant planning and Building Regulations requirements should be confirmed. Some external wall insulation projects may fall within permitted development rights, particularly where the completed finish remains similar to the existing appearance.
Planning permission may still be required where the work materially changes the exterior, affects a flat, involves a listed building or takes place within a conservation area. Certain Oxford properties may also be affected by an Article 4 direction or a previous planning condition that restricts permitted development rights.
Building Regulations are separate from planning permission. They may apply to thermal performance, ventilation, fire safety, structural suitability and installation standards. These matters should be considered before materials are ordered or scaffolding is erected.
Preparing Your Home Before Work Starts
Homeowners may be asked to move garden furniture, plant pots and other items away from the external walls. Access routes should be kept clear so materials and equipment can be moved safely around the property.
Satellite dishes, external lights, alarm boxes, cables, gates and other fittings may need to be temporarily removed or repositioned. The installer should explain which items are included within the project and whether any specialist contractor is required.
Windows and doors will remain usable for much of the project, although there may be short periods when access is restricted while work is completed around openings. Keeping windows closed during dusty preparation stages can help protect the interior.
Scaffolding and Site Protection
Most external wall insulation projects require scaffolding to provide safe access to every elevation. Protective sheeting may be installed where appropriate, and working areas should be organised to reduce disruption around entrances, driveways and gardens.
Windows, doors, paths, roofs and other vulnerable surfaces are normally protected before preparation and coating work begins. Careful masking is particularly important during the application of base coats, primers and finishing renders.
Homeowners should expect some noise and activity during working hours. Cutting insulation boards, drilling fixing holes and preparing damaged walls can create temporary disturbance, but the interior of the property can usually remain occupied throughout the project.
Wall Preparation and Repairs
The existing walls must provide a stable background for the insulation system. Loose render, hollow pebbledash and defective coatings cannot simply be covered because the new system would be dependent on an unstable surface.
Damaged areas may be removed back to a sound substrate before being repaired. Cracks should be assessed to determine whether they are superficial or evidence of wider movement. Algae, dirt and poorly bonded paint may also need to be cleaned or removed.
Sources of water ingress should be resolved before insulation is installed. This may include repairing gutters, downpipes, flashing, roof edges and failed sealant around openings. External wall insulation can protect a prepared wall, but it should not be used to hide an unresolved moisture problem.
Installing the Insulation Boards
Once preparation is complete, the insulation boards are fitted to the exterior using a specified combination of adhesive and mechanical fixings. The type of board will depend on the property and project requirements.
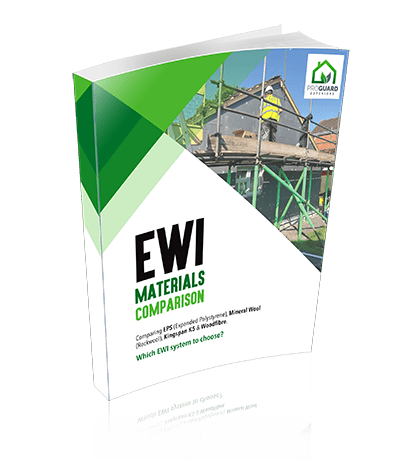
EPS can offer a practical balance between cost and thermal performance. Mineral wool may be selected where breathability, acoustic performance or non combustible insulation is a priority. Phenolic boards such as Kingspan Kooltherm K5 can provide strong thermal performance with a slimmer profile where space is restricted.
The boards are installed in a carefully planned pattern with close joints. Open gaps, poorly aligned boards or inconsistent fixing can reduce performance and affect the finished surface.
Insulation is also installed around window and door reveals wherever practical. These areas require careful detailing to reduce cold spots while maintaining sufficient space around frames, hinges and openings.
Changes Around Windows, Rooflines and Services
External wall insulation increases the thickness of the walls, so several exterior details may need to be altered. Window sills often require suitable extensions to project beyond the new finished surface and direct rainwater away from the wall.
Rainwater pipes, soil pipes, cables, lights and other fixtures may need to be moved forward. Roof edges and overhangs should also be checked to ensure they continue to protect the insulated elevation.
Where the existing overhang is insufficient, roofline alterations may be required. This could involve extending verge details or adjusting soffits and fascias. Identifying this work during the survey helps prevent unexpected changes once installation has started.
Reinforced Base Coat and Mesh
After the insulation boards have been installed and fixed, they are covered with a reinforced base coat. Alkali resistant mesh is embedded into this layer to strengthen the surface and help distribute normal movement across the system.
Additional reinforcement may be installed around windows, doors and other areas where stress is more likely to develop. Corner beads and specialist trims help create straight edges while protecting vulnerable junctions.
The base coat must be applied evenly and allowed to cure before the final finish is installed. Weather conditions can affect curing times, so a professional contractor may adjust the programme during periods of heavy rain, strong wind, low temperatures or excessive heat.
Applying the Final Render Finish
The final stage of the main wall system is the application of a decorative render finish. Silicone render is a popular choice because it creates a pre coloured, weather resistant and low maintenance exterior.
Homeowners can usually select from a range of colours and textures. The chosen finish should complement the style of the property, roof covering, windows and surrounding streetscape.
Because the render is pre coloured, it does not require immediate painting. A consistent application across the elevations helps create a clean appearance and conceals the insulation system beneath.
How Long Will the Project Take?
The duration of an external wall insulation project depends on the size of the property, the number of elevations, wall condition, detailing requirements and weather. A straightforward home may progress more quickly than a property requiring extensive render removal, roof extensions or numerous service alterations.
Drying and curing times must also be respected between different stages. Attempting to rush base coats or render finishes can affect the final quality, so the programme may include periods where visible work appears limited while materials cure correctly.
Your installer should provide an expected schedule before work starts and keep you informed if weather or unexpected repairs cause changes.
Will You Need to Leave the Property?
In most cases, homeowners can remain in the property throughout the installation. The majority of the work takes place externally and does not normally require major changes to internal rooms.
There may be temporary inconvenience from scaffolding, drilling, deliveries and restricted access around sections of the building. Windows may also need to remain closed during certain preparation or coating stages.
Good communication between the installation team and homeowner helps manage access, deliveries and any short periods of additional disruption.
Final Inspection and Site Clearance
Once the render has cured, external fittings can be reinstated and protective coverings removed. The property should then receive a final inspection to check the finish, junctions, sealants, ventilation details and surrounding areas.
Scaffolding is normally removed after the installation has been checked and any finishing work completed. The site should be cleared of waste, unused materials and protective sheeting.
The homeowner should also receive appropriate information about the installed system, maintenance requirements and any applicable guarantees. Although modern rendered EWI systems are designed to require limited maintenance, gutters, sealants and external junctions should still be inspected periodically.
External Wall Insulation Projects Across Oxford
ProGuard Exteriors provides external wall insulation surveys and installations across Oxford, Headington, Cumnor, Boars Hill, Kennington, Wheatley, Abingdon, Eynsham, Radley, Witney and surrounding Oxfordshire areas.
Our team can manage the process from the initial property assessment and wall preparation through to insulation installation, reinforced base coats, render finishes and detailed work around windows, rooflines and external services.
Contact ProGuard Exteriors today to arrange a free survey and learn what to expect from an external wall insulation project at your Oxford property.
ACCREDITED & FULLY INSURED
Our installers are fully insured and accredited by leading industry bodies. Whether working on residential rendering, external wall insulation, or large commercial projects, our highly trained team ensures reliable results with complete safety and compliance.
TRUSTMARK APPROVED
ProGuard Exteriors is endorsed by Trustmark and QualityMark Protection, guaranteeing that our services meet the highest industry standards. These recognitions provide assurance of quality, reliability, and professionalism across all our insulation and rendering solutions.
FREE QUOTES
ProGuard Exteriors offers free, no-obligation quotations for all spray cork, wall coating, insulation, and rendering projects. Whether you’re refreshing a home facade or upgrading a large commercial property, our experts are ready to help you achieve lasting protection and style.










 Your email address will never be shared. By submitting this form you are agreeing to receive messages from ProGuard Exteriors
ProGuard Exteriors Ltd
 Registered Office: 22 Station Road, Stoke Mandeville, Aylesbury HP22 5UL
Registered in England and Wales No. 10352234 | VAT Number: 265 6002 17
enquiries@proguardexteriors.co.uk
03316 300 082
Monday to Friday 8:00am - 6:00pm / Weekends - Closed